Student engineer · Class of 2028

Engineeringin motion.

I’m Ruben Thiagarajah. I connect mechanical design, electronics, and software—from final integration on a cryogenic vacuum chamber to a robot demonstrating prompt-based autonomy.

Designed
Built
Tested
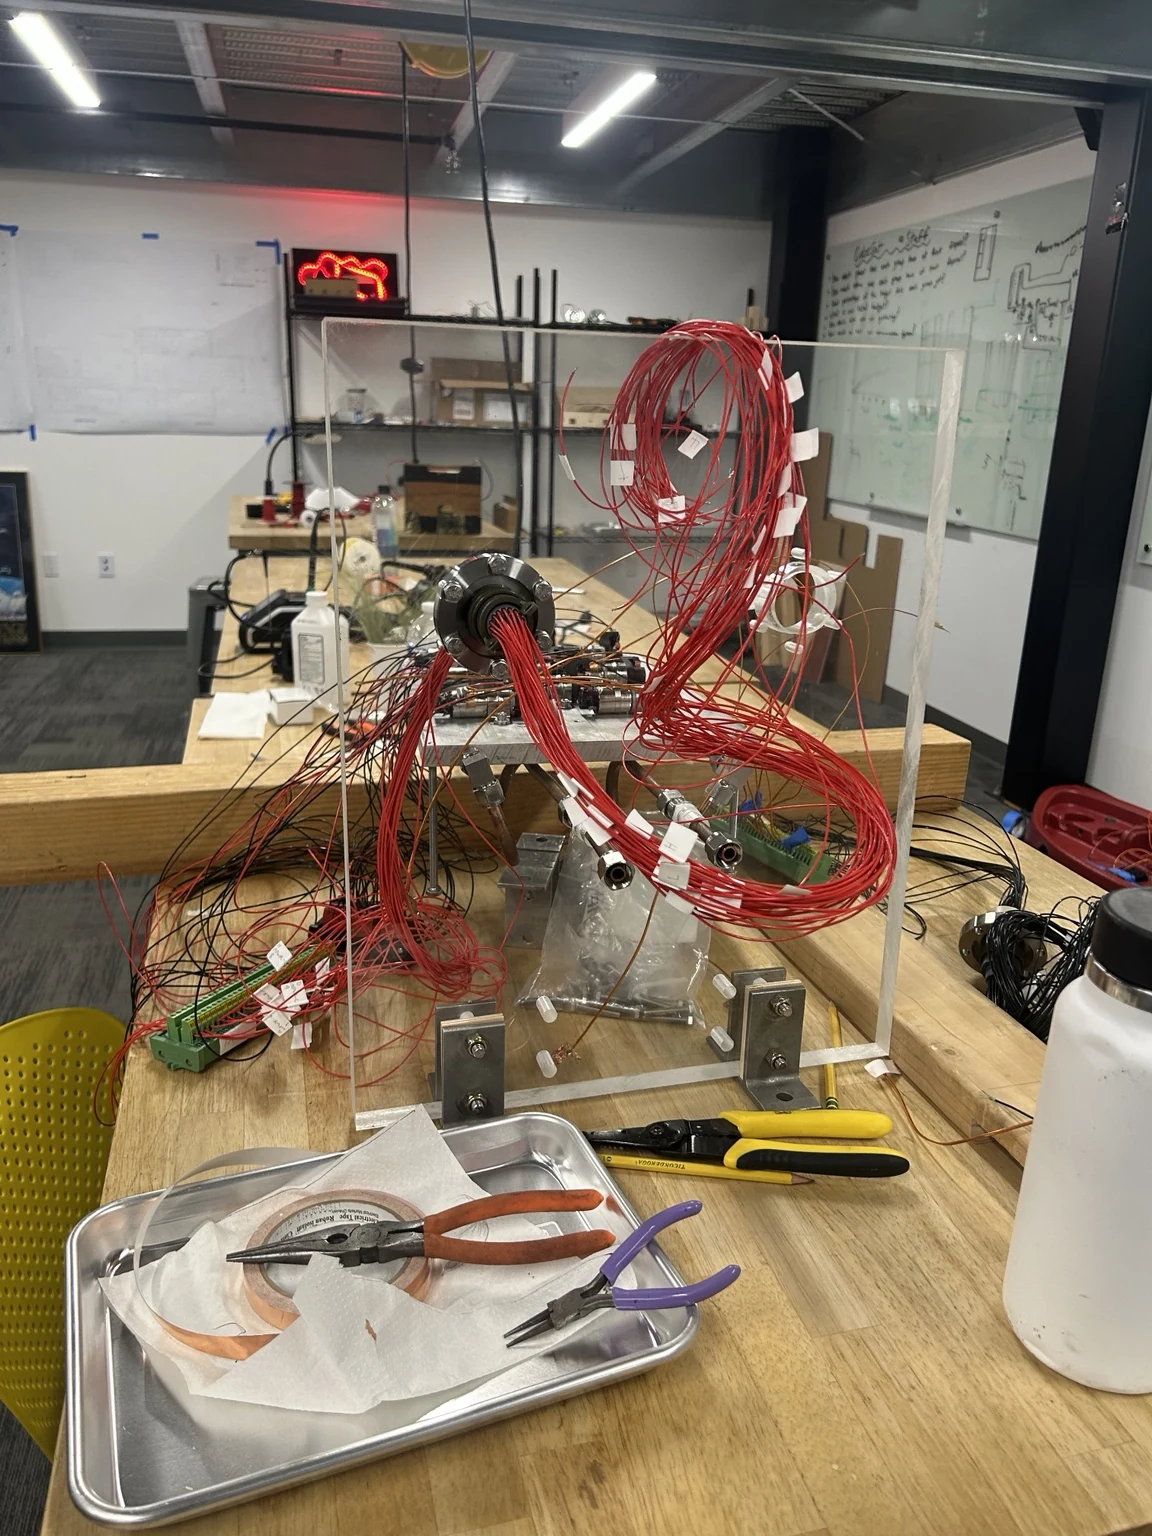
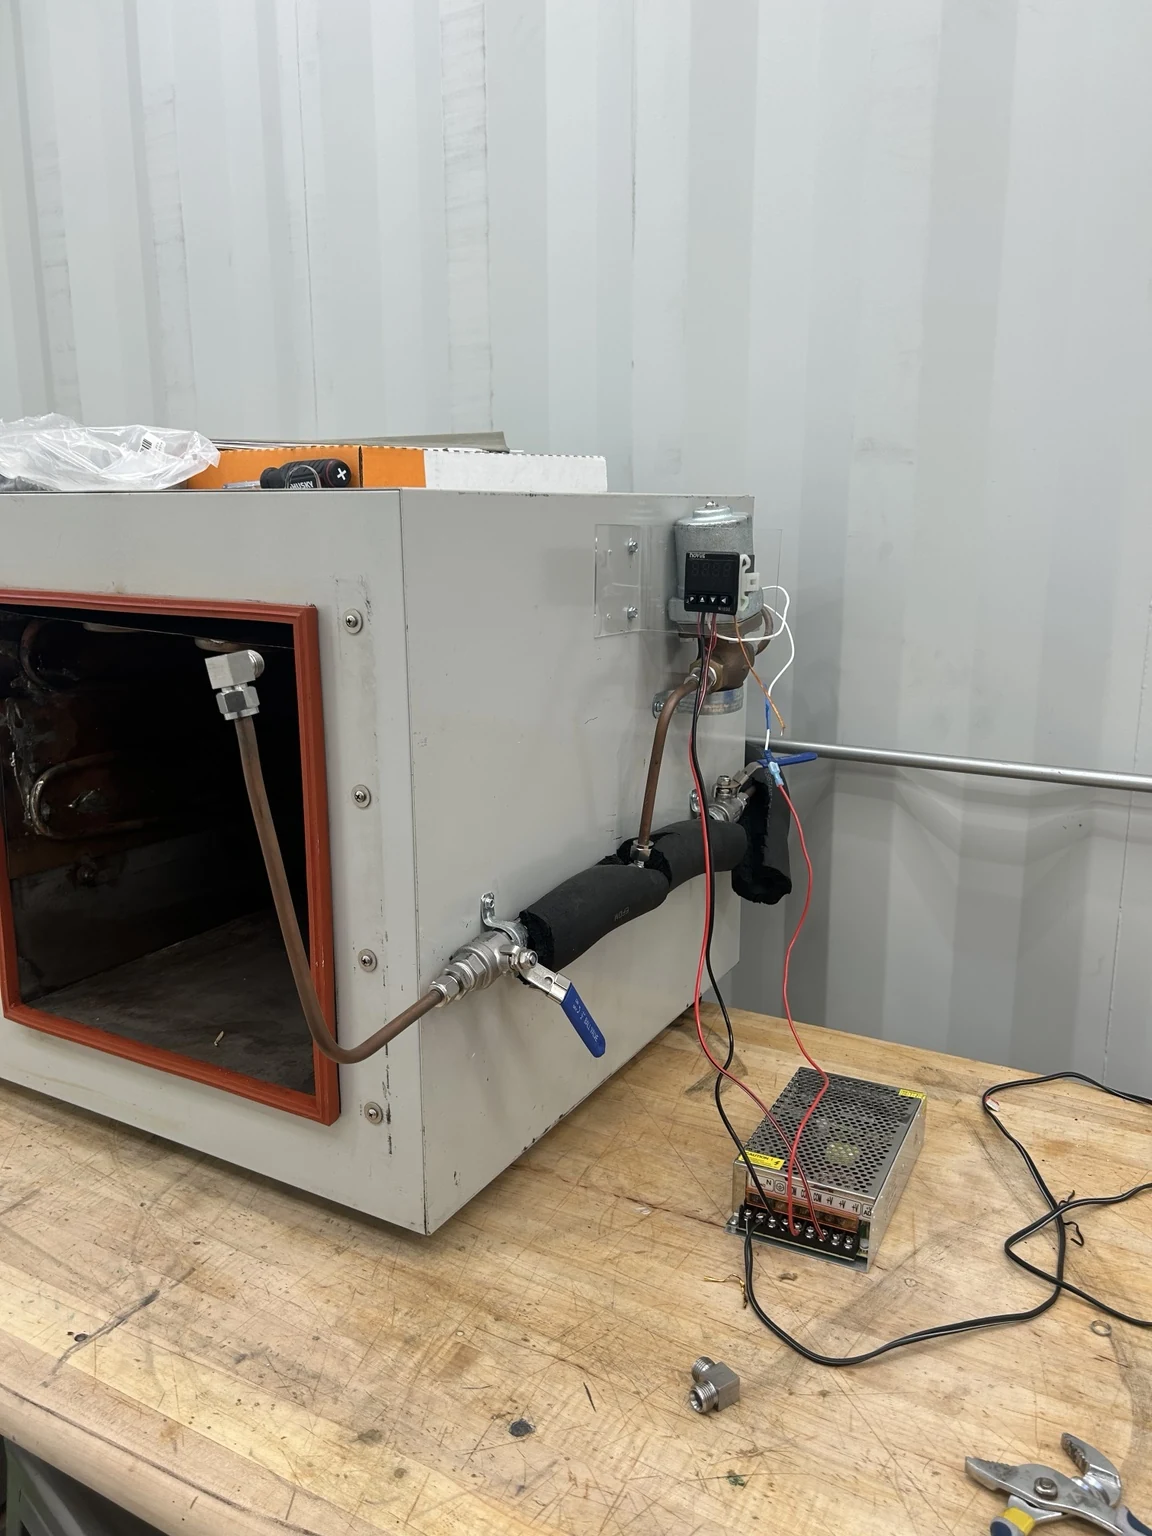
The cryogenic vacuum chamber door and feedthrough wiring I worked on
Cryogenic chamber · Final integration
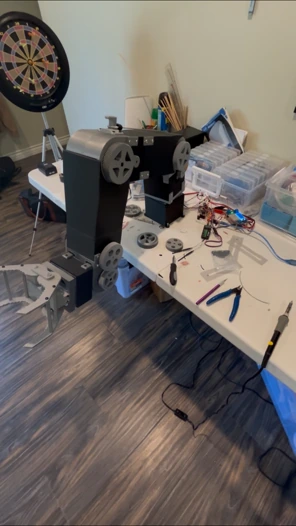
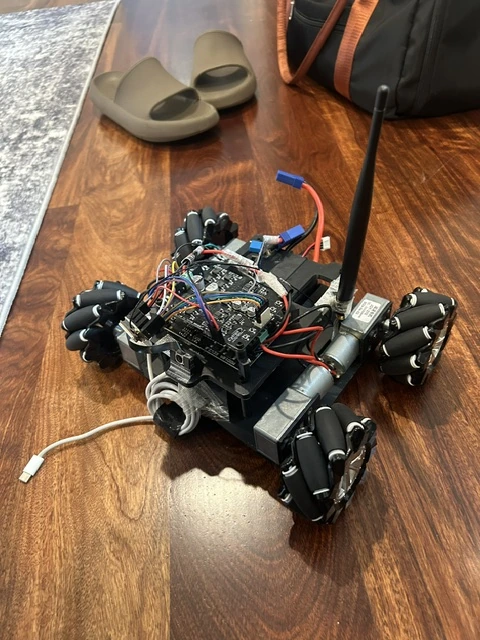
My assembled Omnirobot prototype
Omnirobot · Prompt-based autonomy
Mechanical designEmbedded controlApplied AI
Keep exploring

Selected work

A closer look.

My main project is the cryogenic vacuum chamber, followed by Omnirobot and earlier builds and flight experiments.

Inside the build

Every connection
has a purpose.

Explore the door, wiring, and cooling circuit—and the work I contributed to each.

Clear chamber door with electrical feedthrough and labeled wiresOriginal project photo / 01

My contribution

  • The clear doorCAD + fabrication

    I created the CAD for machining the door and also made the clear door. The first blank had air bubbles between two glued layers, creating a potential leak path when feedthrough bolt holes were drilled. A second iteration needed a machining-alignment correction.

  • Electrical feedthroughsSelection + installation

    I found the appropriate feedthrough connectors and helped install them onto the door, connecting the mechanical interface with the electrical system.

  • 64 labeled wiresJunior-year wiring

    I helped finish wiring and labeling the 64 wires going to two feedthroughs. The photograph documents the wire routing during development.

These photographs show work in progress.

Read the complete chamber story School team project · Final integration

From the test bench

Built. Then put
to the test.

Complete recordings from the actual experiments. Watch here, then explore the project stories.

My approach

From a sketch
to a test.

The interesting part is working out why a design behaves differently than I expected.

01

Define the problem.

Understand the task, the available hardware, and the constraints that shape the design.

02

Make it tangible.

Move from sketches and CAD to printed parts, circuits, and assembled prototypes.

03

Test the behavior.

Find out what the hardware actually does, and isolate the parts that need attention.

04

Revise the design.

Use the result to make the next version more useful, while keeping track of what remains unresolved.

Try an engineering ideaWhy does a longer reach need more torque?

USC Discover Engineering · Summer 2026

Four weeks.
Many ways to build.

From a balsa bridge and logic circuits to robots and rockets, the summer program gave me a chance to lead, build independently, and learn across engineering disciplines.

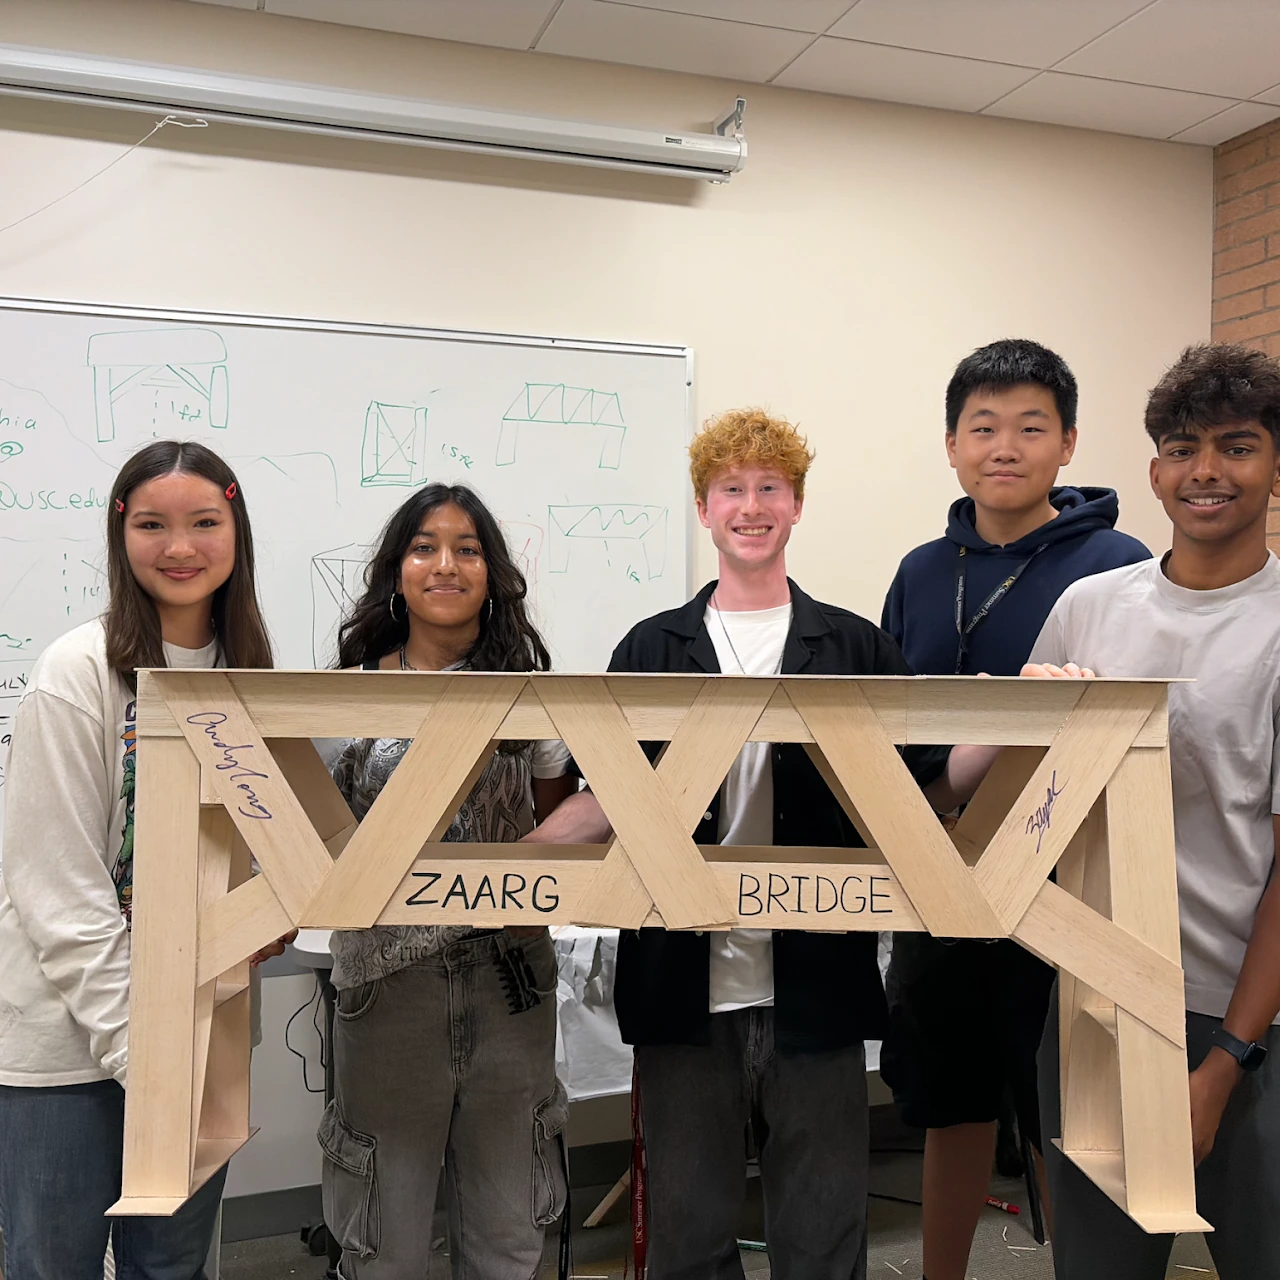
The completed USC Group 10 balsa bridge
Structure meets teamwork.Week 1 · The bridge project I led

A little about me

Curiosity becomes
a working prototype.

I’m a junior at Oaks Christian School, exploring how mechanisms, electronics, and software fit together. My projects give me a way to develop those skills through real builds and their unexpected problems.

More about my background
EducationOaks Christian · Class of 2028
USC summer program · Moorpark dual enrollment
Current workCryogenic chamber + Omnirobot
Design toolsFusion · Onshape · AutoCAD · Codex
Looking aheadInternships + engineering opportunities

Project demonstration

Original project recordingOpen original video ↗